Familiar with the development environment is the first step to learn the microcontroller. Now introduce the development environment of PIC. The development environment of PIC has the old MPLAB IDE and the latest MPLAB X IDE.
MPLAB X IDE than the old MPLAB IDE, write code more convenient, but also low because the probability of error detection MPLAB X IDE from time to time clerical error.
Installation of MPLAB X IDE:
The first step is to install the JAVA runtime environment (because MPLAB X IDE is written in JAVA program)
Install jdk 6.1 (the jrek contains the running environment jre, of course, only jre is installed)
Double-click jdk-6u10-rc2-bin-b32-windows-i586-p-12_sep_2008.exe to install jdk 6.1
The second step is to install the development environment MPLAB X IDE
Mplabx-ide-v1.10-windows-installer.exe
The third step is to install the C compiler.
We use the PIC/10/12/16 series to install picc-9_81-win.exe.
Two icons appear on the desktop after the installation is complete
MPLAB driver switcher drive when choosing If both the MPLAB IDE 8 and MPLAB X IDE on your computer, is used to select the software debugger writer such as ICD PICkit.
MPLAB X IDE v1.10 development environment
Establish a project:
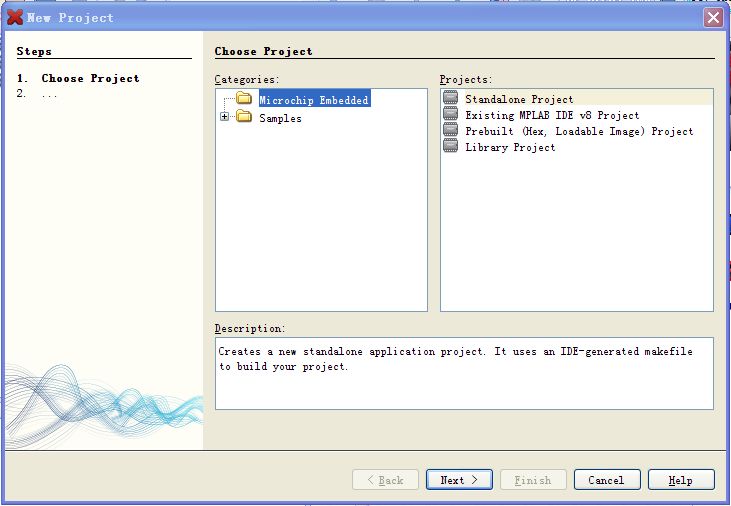
1 Open MPLAB X IDE, File-> New Project in New Project window pop-up Categories: Microchip Embedded in the selection, and then Projects: Select the Standalone Project.
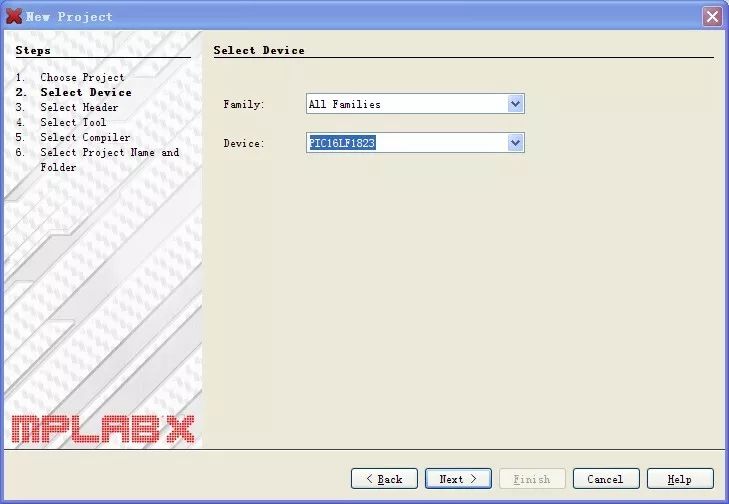
2 Click next, and then select the microcontroller model in Device such as: PIC16LF1823.
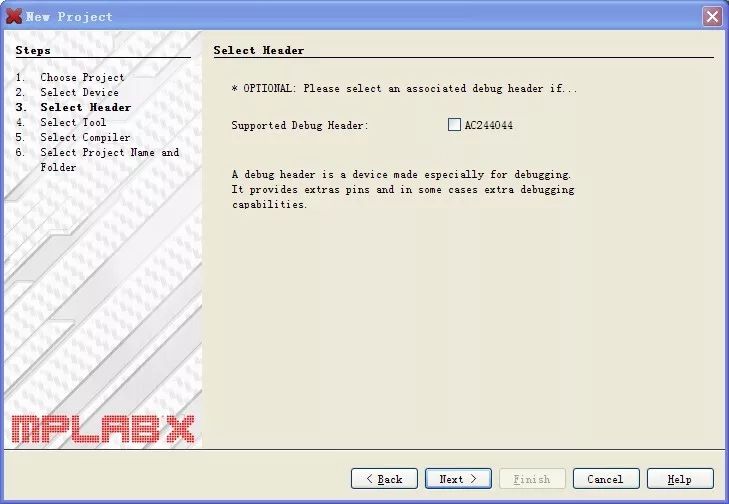
3 Click next, whether to support the debug header is not selected
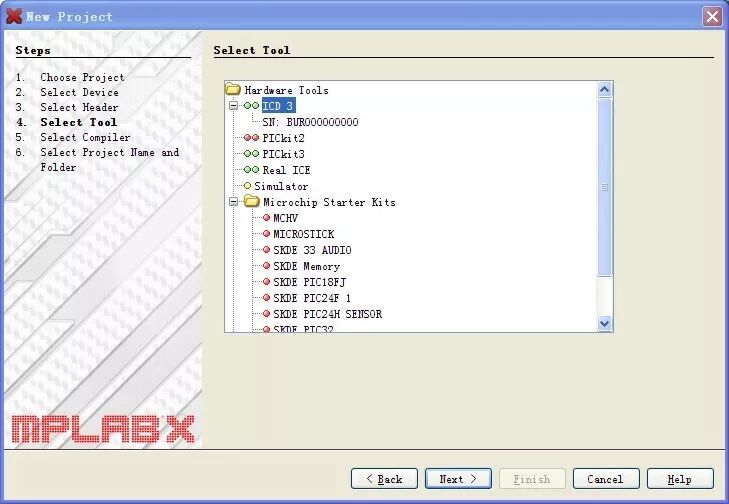
4 Click next, select tools such as; select ICD3
5 Click next, select the compiler such as: select HI-TECH PICC (V9.81)
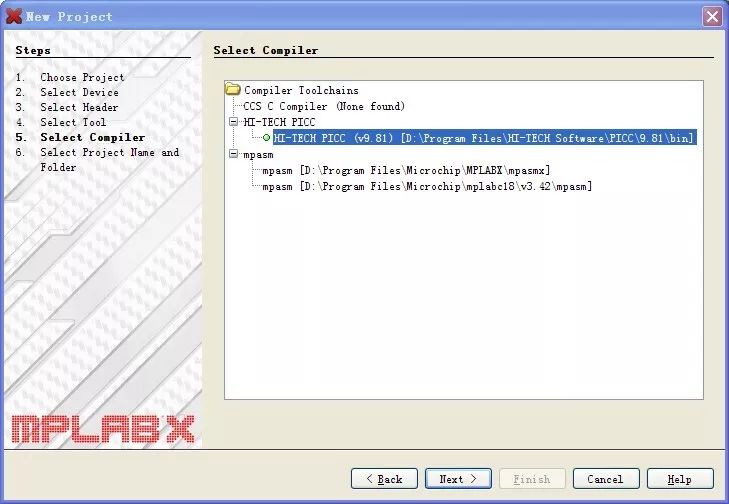
6 Click next, enter the project name in the Project Name such as: myproject, click Browse... select the path where the project file is stored, and then click Finish to complete the project.
Added: If you want to support Chinese, change Encoding to GB2312.
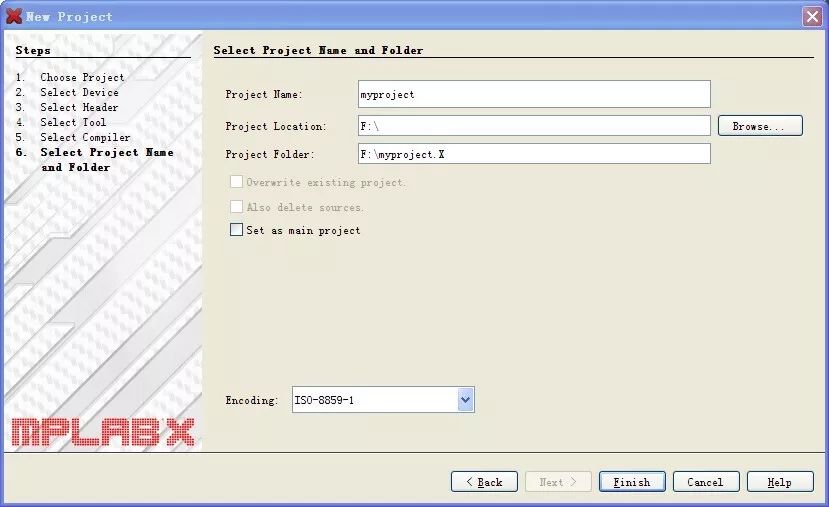
7 You can see the project we created in the Projects window.
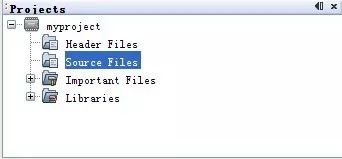
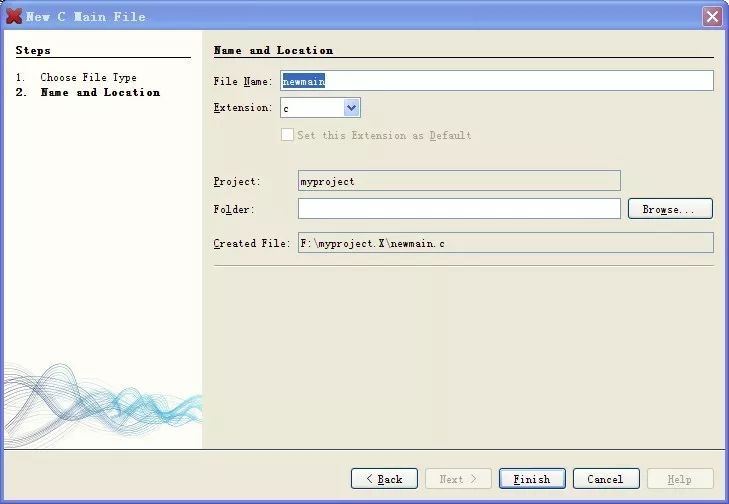
8 Right-click Source Files -> New-> C Main Flie .... pop-up window New C Main File, click Finish to establish the source file.
9 We can write C code in it.
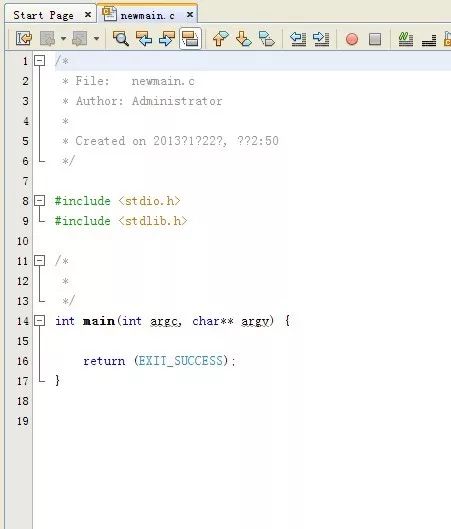
10 After compiling the code, you can click the button on the toolbar. 
11 Burning on the toolbar 
supplement:
If you use ICD3 to program, you can choose how to choose internal power supply?
1, File->Project Properties pop-up window
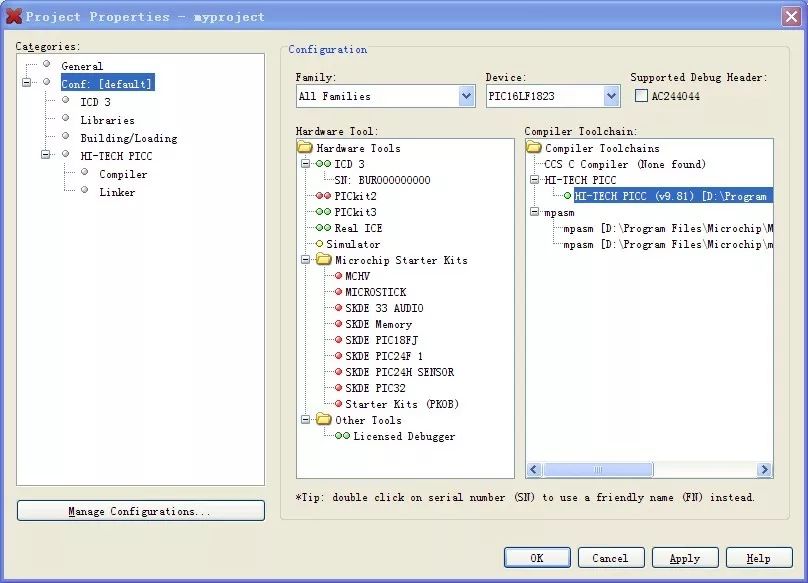
2. Click on ICD3 in Categories and select Power from the drop-down list in the Options categories.
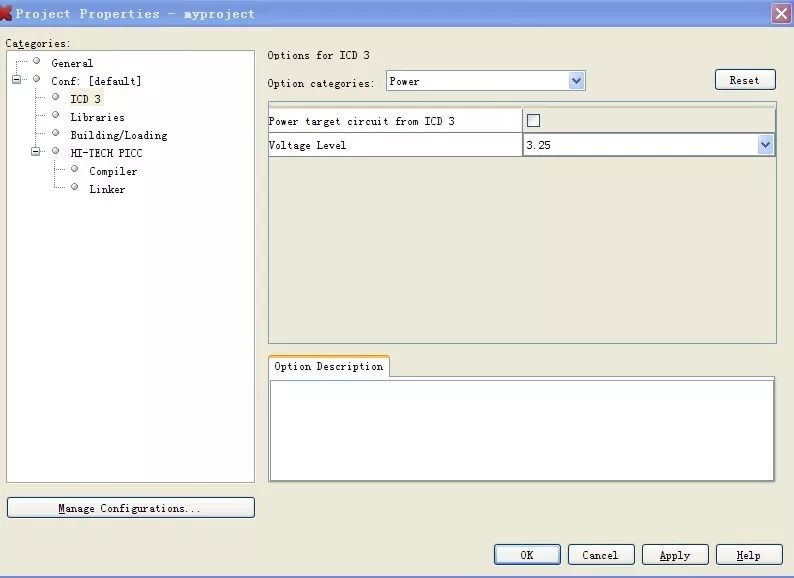
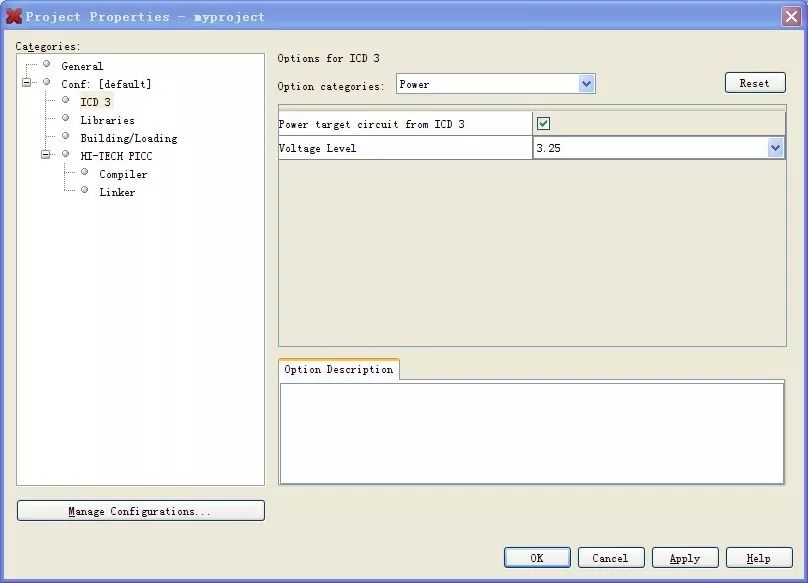
3, hook Power target circuit from ICD3, Voltage Level selection voltage (typically to default).
Laptop Computer,Core I5 Laptop,Metal Slim Laptop,Fhd Laptop
C&Q Technology (Guangzhou) Co.,Ltd. , https://www.gzcqteq.com